
“One cannot think well, love well, or sleep well if one has not dined well.” -Virginia Woolf
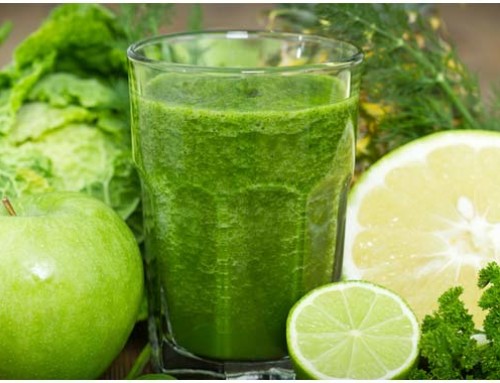
Nutrient-dense foods are a cornerstone to restoring imbalances and maintaining vitality. They enhance the texture and flavor of any meal, as well as satisfy our deepest cravings. The following foods were parts of many traditional cultures, and our ancestors ate these with great regularity:
- naturally-fermented foods: pickles, kraut, kvass, yogurt/kefir
- homemade bone broth
- organ meats
- natural fats: cod liver oil, olive oil, coconut oil, butter and other animal fats (from pastured animals)
Below are a few basic recipes* that can be used as a foundation for traditional cooking:
Bone Broth (Chicken)
- 2 to 3 pounds of bony chicken parts, such as necks, backs, wings (or entire bones from previously roasted chicken
- 2-4 chicken feet &/or heads (for gelatin)
- 4 quarts cold filtered water
- 2 tablespoons vinegar (raw apple cider vinegar recommended)
Place chicken parts in a large stainless steel pot with water, vinegar. Bring to a boil, and remove scum that rises to the top. Reduce heat, cover and simmer for 6 to 8 hours. The longer you cook the stock, the richer and more flavorful it will be; the more gelatin and minerals there will be in the broth. Remove whole chicken parts with a slotted spoon. Add salt and pepper to taste. This will impart additional mineral ions to the broth.
Strain the stock into a large bowl and reserve in your refrigerator until the fat rises to the top and congeals. The finished broth should be gelatinous when cooled. Reserve the stock in covered containers in your refrigerator or freezer. If freezing, be sure to allow 2-3 inches at the top of the jar to allow for expansion when frozen; also allow the broth to cool fully in order to minimize cracking if using glass containers.
Add this delicious bone broth to stir-frys, stews, rice dishes, etc. For additional flavor, add 1 chopped onion, chopped garlic, chopped carrots while simmering; and top off with chopped parsley when done.
If using bones from beef, lamb, or pork, simmer for longer periods of time to extract the most gelatin and nutrients (minimum of 12 hours, best to be done overnight; some recommend simmering for 36-72 hours).
Beet Kvass (Fermented Beet Beverage)
- 3 medium or 2 large organic beets, peeled and chopped up coarsely (1 cm x 1 cm cubes, roughly)– do not grate beets, as this will cause alcoholic fermentation rather than lacto-fermentation to occur
- 3 Tablespoons sea salt
- filtered water
Place beets and salt in a 1/2-gallon glass jar (2 quarts). Add filtered water to fill the container. Cover securely and turn upside-down a few times to mix. Keep in a cool, dark place for 3-5 days before transferring to a refrigerator.
Beet kvass does not smell or taste like kraut or other fermented vegetables. The fermented juice tastes like salty beet syrup. If the smell is putrid, throw it out, as lactofermenting bacteria should not cause a foul odor. Use the beet kvass either straight (eastern Europeans would drink this as a 4 oz drink twice a day as a digestive aid and as a blood tonic), or use it to enhance flavors of dishes (be sure to add directly into bowls before eating; cooking it will destroy the beneficial bacteria). It is wonderful to use as a base for salad dressings with olive oil.
When most of the liquid has been drunk, you may fill up the container with water and salt and keep at room temperature another two days. The resulting brew will be slightly less strong than the first. After the beets have lost their color, discard the beets and start a fresh batch. You may, however, reserve some of the liquid and use this as your inoculant for the subsequent batch.
Homemade Yogurt
- Yogurt Starter (like the one available at www.natren.com)
- 2 quarts of milk (preferably whole raw milk; otherwise, pasteurized but unhomogenized whole milk, if available)
- Thermometer (temperature range 110° – 200° / 40° – 95°)
- 2 – 3 quart double boiler with lid or yogurt maker
1. HEATING THE MILK: To prevent scorching, heat the milk in a double boiler or water bath. Use a stainless steel, glass or enamel container. Heat the milk to 180° – 190°F (82° – 88°C) for 20 to 40 minutes to achieve gourmet results. Low fat and non-fat milk must be heated the full 40 minutes. Do not heat the milk in a microwave oven. Do not overheat.
2. COOLING THE MILK: The milk must be cooled to 110° – 115°F (43° – 46°C) before adding the yogurt starter (takes about 10 min). This is important so the bacteria will thrive and the yogurt will set properly. The milk cooling process may be accelerated by placing the pan in cool water (be careful not to splash any water in the milk). You may also stir the milk to hasten the cooling. The longer the milk cools, the thicker and tastier your yogurt will be.
3. ADDING THE STARTER: Add yogurt starter according to package directions. Place the starter in an empty cup and pour about 2 tablespoons of the cooled 110° – 115°F (43° – 46°C) milk into the starter and stir to form a smooth paste. Continue adding milk to the paste, thoroughly blending after each addition until the cup is nearly full. Stir this mixture gently back into the pan of cooled milk and mix thoroughly.
4. INCUBATION:
Yogurt makers– Follow the manufacturer’s instructions for incubation.
Oven method– Gas oven – place on the top shelf, in the back.
Electric oven– Wrap the container with a towel before placing in the oven.
5. REFRIGERATION AND STORAGE: When set, refrigerate the yogurt and leave it undisturbed for several hours until thoroughly chilled. There will be a watery separation on the top – this is whey – do not stir it in – pour or spoon it off. If you desire, you can save it and use it in place of other liquids in cooking. Finished yogurt will be good for at least 10 days. It is not a good idea to add anything to the yogurt while it is being stored, as this may reduce the beneficial bacteria and cause fermentation.
*recipes adapted from Nourishing Traditions cookbook and Natren Probiotics


Leave A Comment